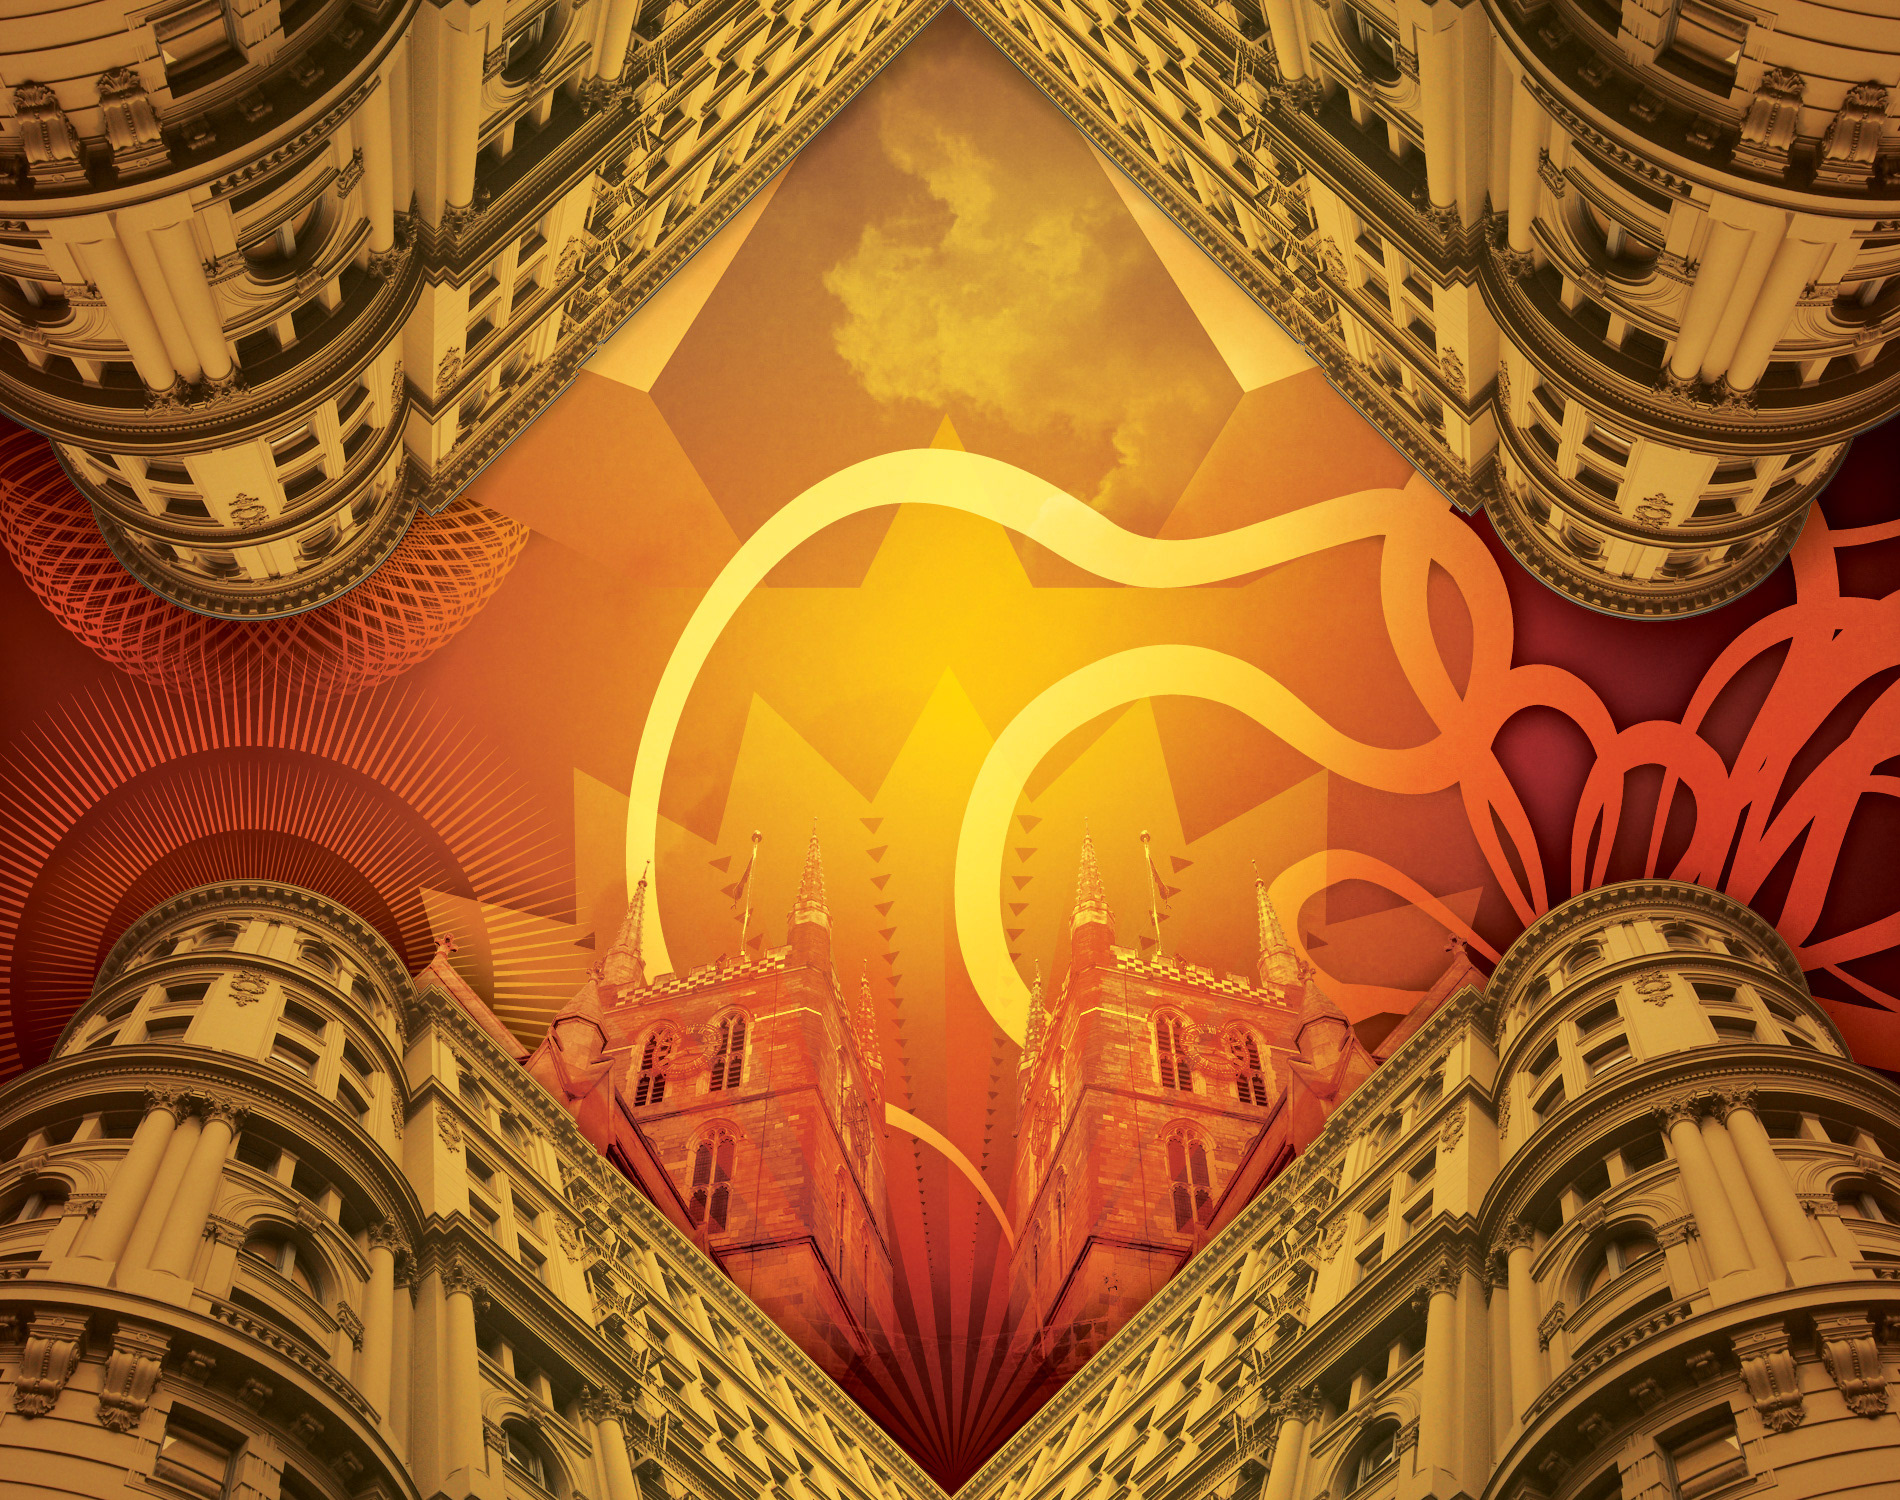
Warping Perspectives
This tutorial aims to teach how to create an illustration, utilizing different layer styles,
blending modes, image adjustments and 3D elements. Usually, as a work method, you should always think and draw beforehand what you intend to create, in order to decide what is it that you want to achieve (very much in the line of story boarding your work). All the elements needed to create the illustration are provided.
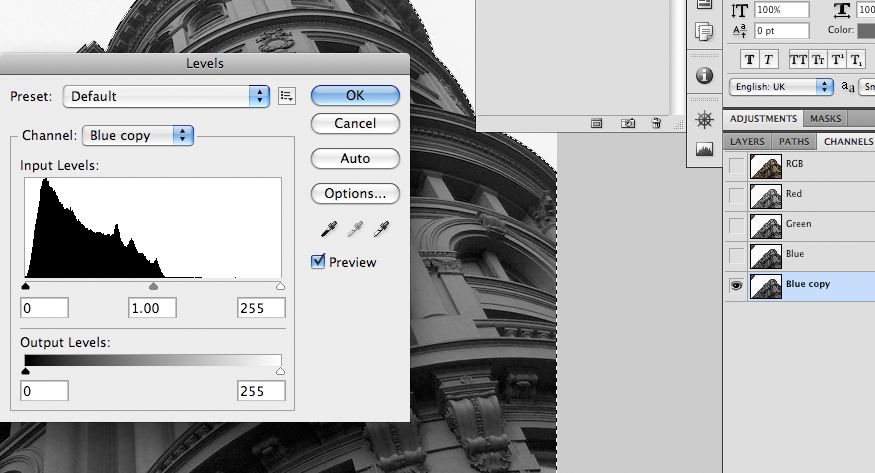
1- Removing background from images
Open the file “monument001.psd”. The process you apply here can be recreated for the other photo that is part of the tutorial. Under the tab “Channels”, duplicate the “Blue Channel” which is part of the image. You can duplicate the channel by selecting it and dragging it to the “Create New Channel” icon or through the shortcut “Control+Click+Duplicate Channel/Right Click+Duplicate Channel”. In order to easily remove the background from the photo, use the command Image > Adjustments > Levels (shortcut “Command+L/Control+L”). Drag the sliders (the left slider corresponds to darker tones, the right slider to the lighter tones), until you start seeing the document change its’ contrast. The goal is to make the building in the photo an area completely dark and the sky an area completely white. You have to refine your selections and continue to apply the command previously described until the image is correctly outlined. Once you’re satisfied with the contrast of the channel, “Command+Click/Control+Click” on the channel - that will highlight the white area of the channel. Invert the selection through the command “Select > Inverse” (shortcut “Command+Shift+I/Control+Shift+I). Select the tab “Layers” and copy and paste the selection in the layer you were working on. You should have the building separated from the sky background. Apply the same process to the other image, “monument002.psd” that is part of the tutorial.
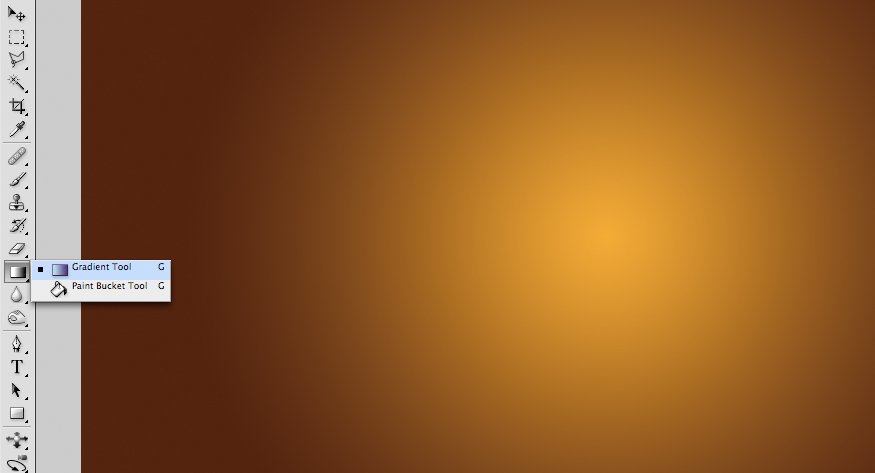
2- Building the base elements of the illustration
Create a new document sized 1900 pixels (width) by 1500 pixels (height), with a white background. You can control which background you have in the window “New”, under the category “Background Contents”. Create a new layer and use the Gradient Tool (shortcut G) to create a radial gradient that stretches from the center top to the bottom (foreground color - Red:241, Green:169, Blue:28; background color - Red:84, Green:36, Blue:15).
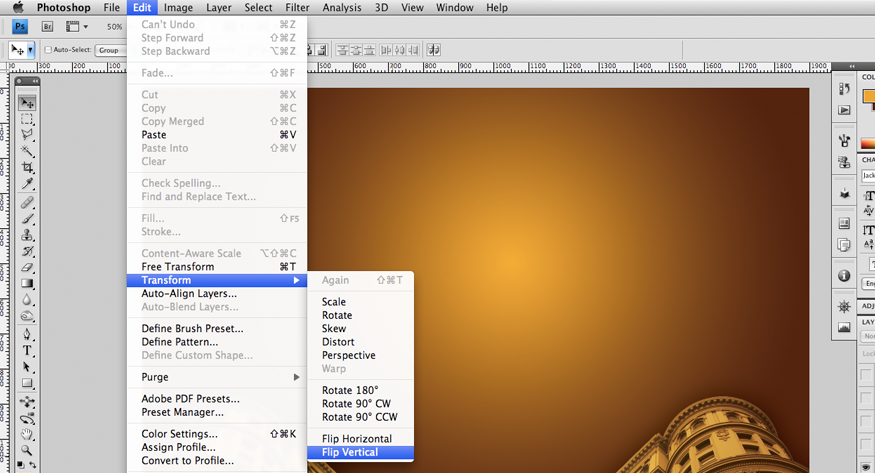
3- Positioning the first elements
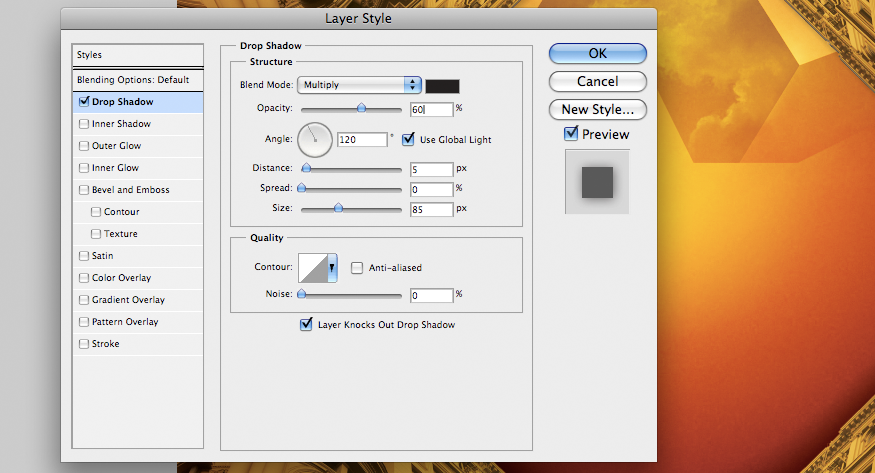
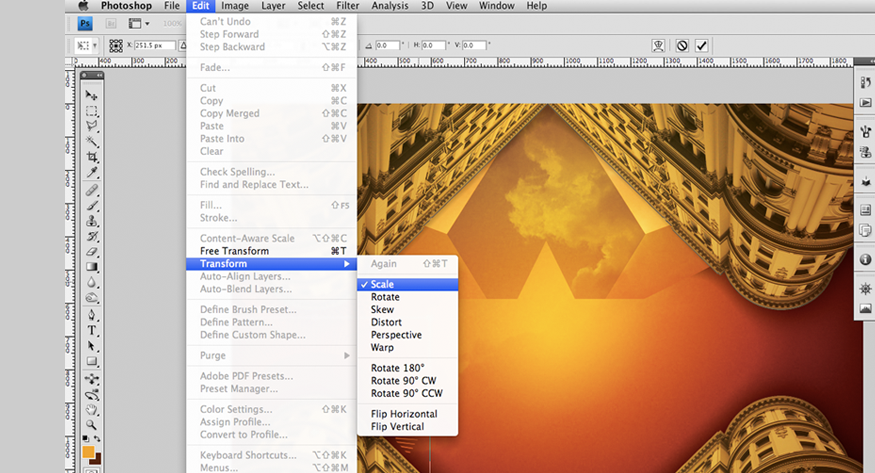
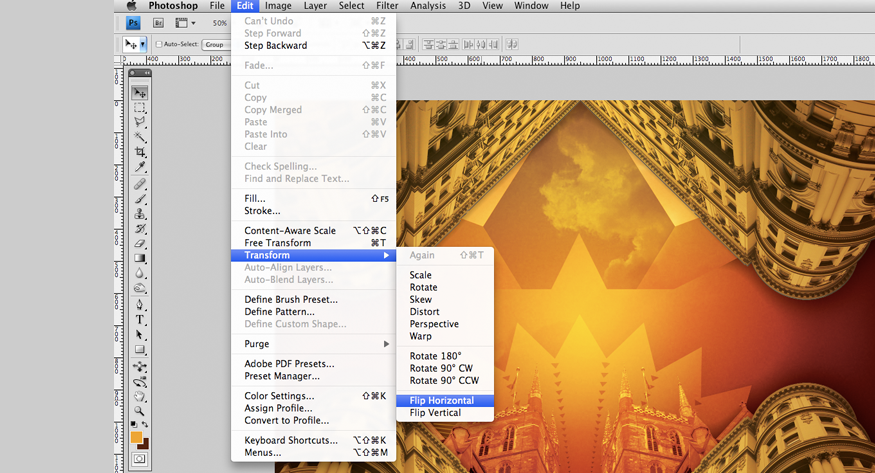
Open the document “monument001.psd” and place it at the bottom of the canvas you created. You will need to change the scale of that layer. Use the command Edit > Transform > Scale (shortcut “Command+T/Control+T”) and place the value at 50%. Copy this layer through the command Layer > Duplicate Layer. Use the command Edit > Transform > Flip Horizontal and drag the layer to the opposing side to give them both a mirror-like effect. Select both layers and merge them through the command Layer > Merge Layers (shortcut “Command+E/Control+E). With this new layer selected, add the effect “Drop Shadow” with the following values: Blend Mode - Multiply, Opacity - 75%, Distance - 5, Spread - 0 and Size - 85 (the color of the shadow should be Red: 35, Green: 31, Blue: 32). Activate the selection corresponding to this layer, through the command “Command+Click/Control+Click”. Create a new layer and using the selection previously activated, fill it with a Gradient - radial (shortcut G) with the following colors, foreground - Red: 238, Green: 187, Blue: 82 and background - Red: 126, Green: 77, Blue: 37. Change the blending mode of this layer to “Overlay”. Select both these layers and use the command Edit > Transform > Flip Vertical to mirror them, but vertically. Drag these layers to the top side of the canvas.
4- Enriching the illustration with different elements
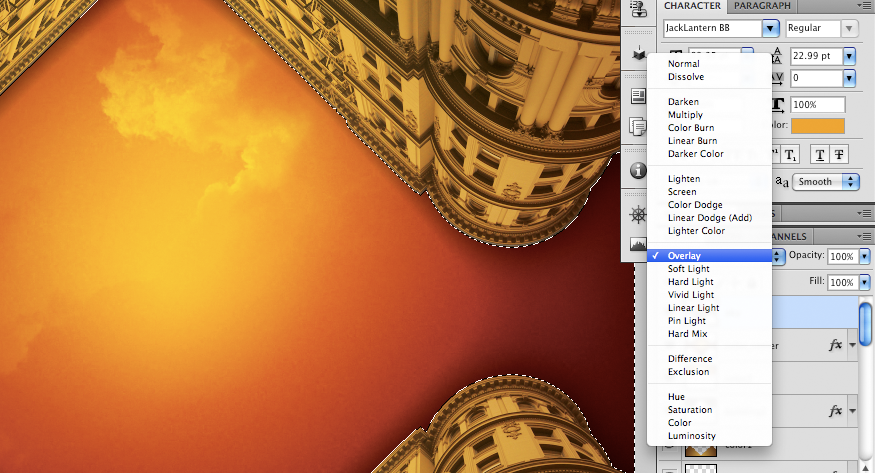
Activate the selections corresponding to the layers on the bottom and top section of the canvas, through the command “Command+Click/Control+Click + Shift” (adding the shift allows you to select multiple areas). Invert the selected area through the command Select > Inverse (shortcut “Shift+Command+I/Shift+Control+I). Create a new layer and fill it with a gradient (gradient tool, shortcut “G”), with the following colors, foreground - Red: 238, Green: 187, Blue: 82 and background - Red: 126, Green: 77, Blue: 37. Change the blending mode of this layer to “Hard Light” and add the effect “Inner Shadow” with the following values (Blend Mode - Multiply, Opacity - 75%, Angle - 120º, Distance - 5, Spread - 0 and Size 185). Open the document “sky.psd” and place it on top of the layer previously created. Using the command “Command+Click/Control+Click” on the layer with the gradient you created, select the layer containing the sky image and use the command Edit > Copy (shortcut “Command+C/Control+C”), followed by Edit > Paste (shortcut “Command+V/Control+V”). Delete the layer containing the sky image, and keep the new layer with the specific section you just created. Access the command Image > Adjustments > Desaturate (“Shift+Command+U/Shift+Control+U”), in order to remove all color from the image, and change the blending mode of the layer to “Overlay”. The additional layers you are going to keep on adding should be placed beneath these layers.
5- Adding details to increase depth
Open the document “3d_cube.psd” and drag it to the top of the canvas. You can create this three dimensional element through Adobe Photoshop, utilizing the command 3D > New Shape from Layer > Cube. You can control the rendering quality (and other settings) of the element through the associated window. Copy the 3D layer using the command seen in the previous step and access Edit > Transform > Flip Horizontal. Align the edges of both layers and merge them through the command Layer > Merge Layers (shortcut “Command+E/Control+E). Add the effect “Drop Shadow” with the following values: Blend Mode - Multiply, Opacity - 60%, Angle - 120º, Distance - 5, Spread - 0 and Size 85. Activate the selection corresponding to this layer, through the command “Command+Click/Control+Click”. Create a new layer and using the selection previously activated, fill it with a Gradient - radial (shortcut G) with the following colors, foreground - Red: 206, Green: 195, Blue: 123 and background - Red: 215, Green: 115, Blue: 48. Change the blending mode of this layer to “Overlay”.
6- Working with Blending Modes
Open the document “net001.psd” and place it in the left side of the main document. Change its blending mode to “Overlay”. Add the effect “Drop Shadow” with the following values: Blend Mode - Multiply, Opacity - 75%, Distance - 5, Spread - 0 and Size - 85 (the color of the shadow should be Red: 35, Green: 31, Blue: 32). Do the same procedure as what was just described with the document “spikes.eps”, placing the layer in the bottom middle section of the canvas (and altering the blending mode to “Soft Light”). Open the document “rays.psd” and place it on the lower left side of the document. Change its blending mode to “Overlay”. Add the effect “Drop Shadow” with the following values: Blend Mode - Multiply, Opacity - 75%, Distance - 5, Spread - 0 and Size - 85 (the color of the shadow should be Red: 35, Green: 31, Blue: 32). Make two copies of this layer, using the command Layer > Duplicate Layer, and change their scaling respectively to 50% and 25%, using the command Edit > Transform > Scale.
7- Adding detailed elements to refine the look
Open the document “monument002.psd” and place it in the lower section of the canvas. Change its blending mode to “Hard Light”. Add the effect “Drop Shadow” with the following values: Blend Mode - Multiply, Opacity - 75%, Distance - 5, Spread - 0 and Size - 85 (the color of the shadow should be Red: 35, Green: 31, Blue: 32). Copy this layer using the command Layer > Duplicate Layer, and create the mirror effect mentioned earlier using the command Edit > Transform > Flip Horizontal.
8- Adding layer effects to create an extra dimension
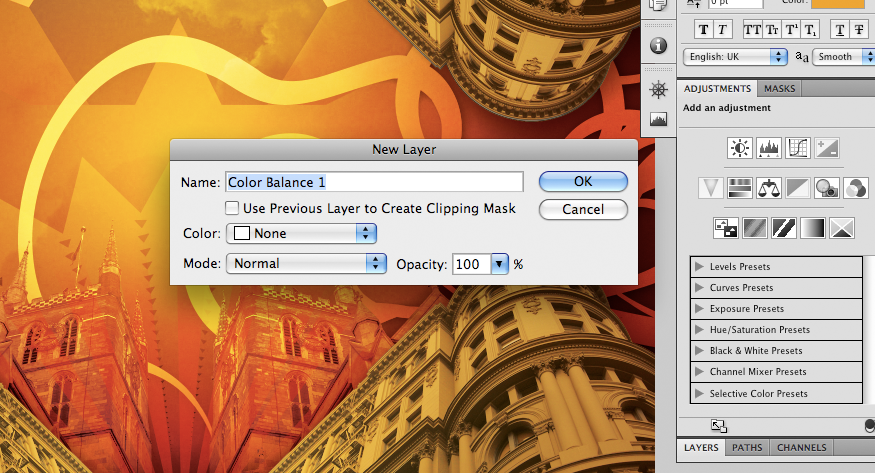
Open the document “rays2.psd” and place it in the middle bottom part of the canvas. Change its blending mode to “Overlay”. The opacity of this layer should be 50%. Open the document “lines.eps” and place it in the left bottom part of the canvas. You can alter the color of the lines for a better effect (one way to change the colors rapidly is to create an adjustment layer, through the command Layer > New Adjustment Layer > Color Balance, altering the sliders to achieve the colors desired). Add the effect “Drop Shadow” with the following values: Blend Mode - Multiply, Opacity - 75%, Distance - 5, Spread - 0 and Size - 85 (the color of the shadow should be Red: 35, Green: 31, Blue: 32). The blending mode of this layer should be “Screen”.
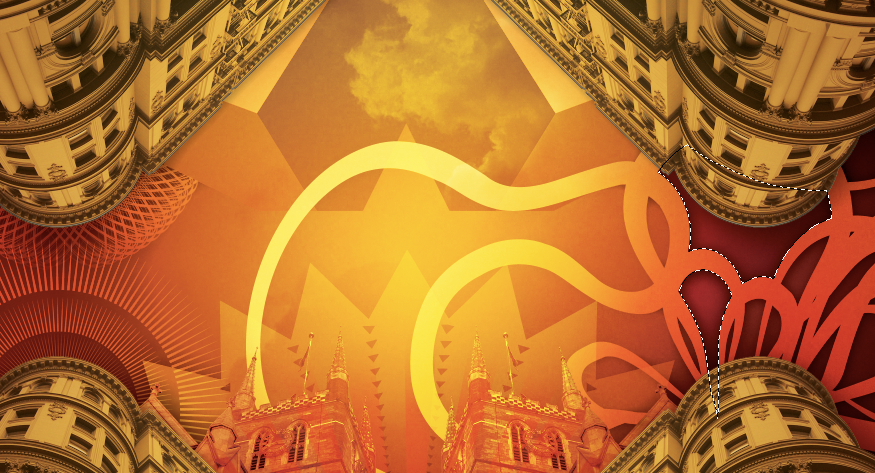
9- Final Details of the illustration
In order to provide additional detail to the illustration, select the layer containing the lines from the previous step. Using the Wand tool (shortcut “W”), select sections in between the lines, create a new layer (through the command Layer > New > Layer, shortcut “Shift+Command+N/Shift+Control+N”) and fill these areas with the following color - Red:198, Green:48 and Blue:36. Add the effect “Inner Shadow” with the following values (Blend Mode - Multiply, Opacity - 75%, Angle - 120º, Distance - 5, Spread - 0 and Size 185) and alter the blending mode to “Multiply”. Enjoy!